Map Editor User Guide - Styles
|
Installation Feature LayerStyles Effects Drop Shadow |
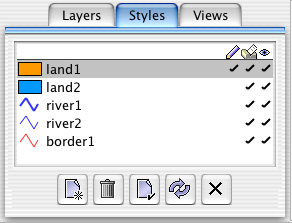
Every map feature and layer has an associated style. The style describes how the feature is painted - its fill color, line style, text font, symbol and so on. This section describes how to create and use feature styles.Styles are inherited up the layer hierarchy, so if a feature has no assigned style, the style of the containing layer will be used instead. Creating and Editing StylesTo create a new style, show the styles panel by invoking the "Layers and Styles" menu item and selecting the "Styles" tab. This looks like this:
The Styles Panel Click on the "New" button to create a new style which will draw as a thin black line. In order to edit a style, select it in the list and press the "Edit" button, or simply double-click the style in the list. This will show the Style Properties dialog: (picture) The Style Properties Dialog Since styles have many properties, this is quite a large dialog and is split into several pages. The first page allows you to set the name and ID of the style. The name is the human-readable name which appears in the style panel, while the ID is an internal name to identify the style. Some data importers will use the ID in order to associate features with pre-existing styles. For example, the tabular data importer can use the value of a given table column as the ID of the style to be used when creating features. Line StyleThe Line page lets you choose the line style to be used to draw linear features. Choose the line style from the combo box. If any Stroke plugins are installed, you may see extra line styles and controls appearing in this page. Fill StyleThe Fill page lets you choose the paint to be used to fill polygons and certain symbols. Choose a colour by clicking on the colour swatch. If any paint plugins are installed, you may get further options available from the combo box. This allows you to choose special paints such as image textures and gradient or hatched fills. TextThe text page lets you choose the font to be used for features which draw text. Choose the font from the combo box and the "bold" and "italic" checkboxes. Text can be drawn at a constant size or it can scale with the map as you zoom in and out. In the latter case, you need to specify the size of the text in map units in the size text field. This causes the font-size to be ignored and the text to be scaled to the size you specify in map units. SymbolsThe symbols page allows you to set a symbol to be drawn for features. Symbols are grouped into symbol sets which typically contain symbols derived from a font file or other plugin. Choose a symbol set and a symbol from that set using the combo boxes. Symbols can be drawn at a constant size or they can scale with the map as you zoom in and out. In the latter case, you need to specify the size of the symbol in map units in the size text field. Assigning Styles to FeaturesYou can assign a style to a feature or group of features in three ways: 1) Select the features you want to change, then select the style in the Styles panel and press the "Assign" button. 2) Double-click on a feature or select it and invoke the "Properties" menu item, then choose the style from the combo box in the properties dialog. 3) To assign a style to all features in a layer, edit the layer and select the style in the dialog. This only works if the features do not already have a style. Note that some special-purpose features may choose to ignore some or all of the styles settings. ExamplesLine Styles: In the image below, the streets are drawn twice, once with a thick black line, once with a thinner orange line. The line width scales with the map and the orange style is set to not display above a certain scale.
|